A garden pipe is an essential tool for watering plants, washing outdoor areas, and maintaining a healthy garden. However, many homeowners overlook its maintenance, leading to frequent leaks, blockages, and early replacement. Proper garden pipe cleaning and correct storage methods can significantly extend its lifespan while ensuring smooth water flow.
In this guide, you’ll learn how to clean a garden pipe properly, dry it correctly, and explore the best way to store garden hose so it stays flexible, hygienic, and damage-free for years. Whether you use a hose pipe, garden hose pipe, or garden hosepipes, these simple maintenance steps will help you get the most value out of your investment.
Why Regular Garden Pipe Cleaning Is Important
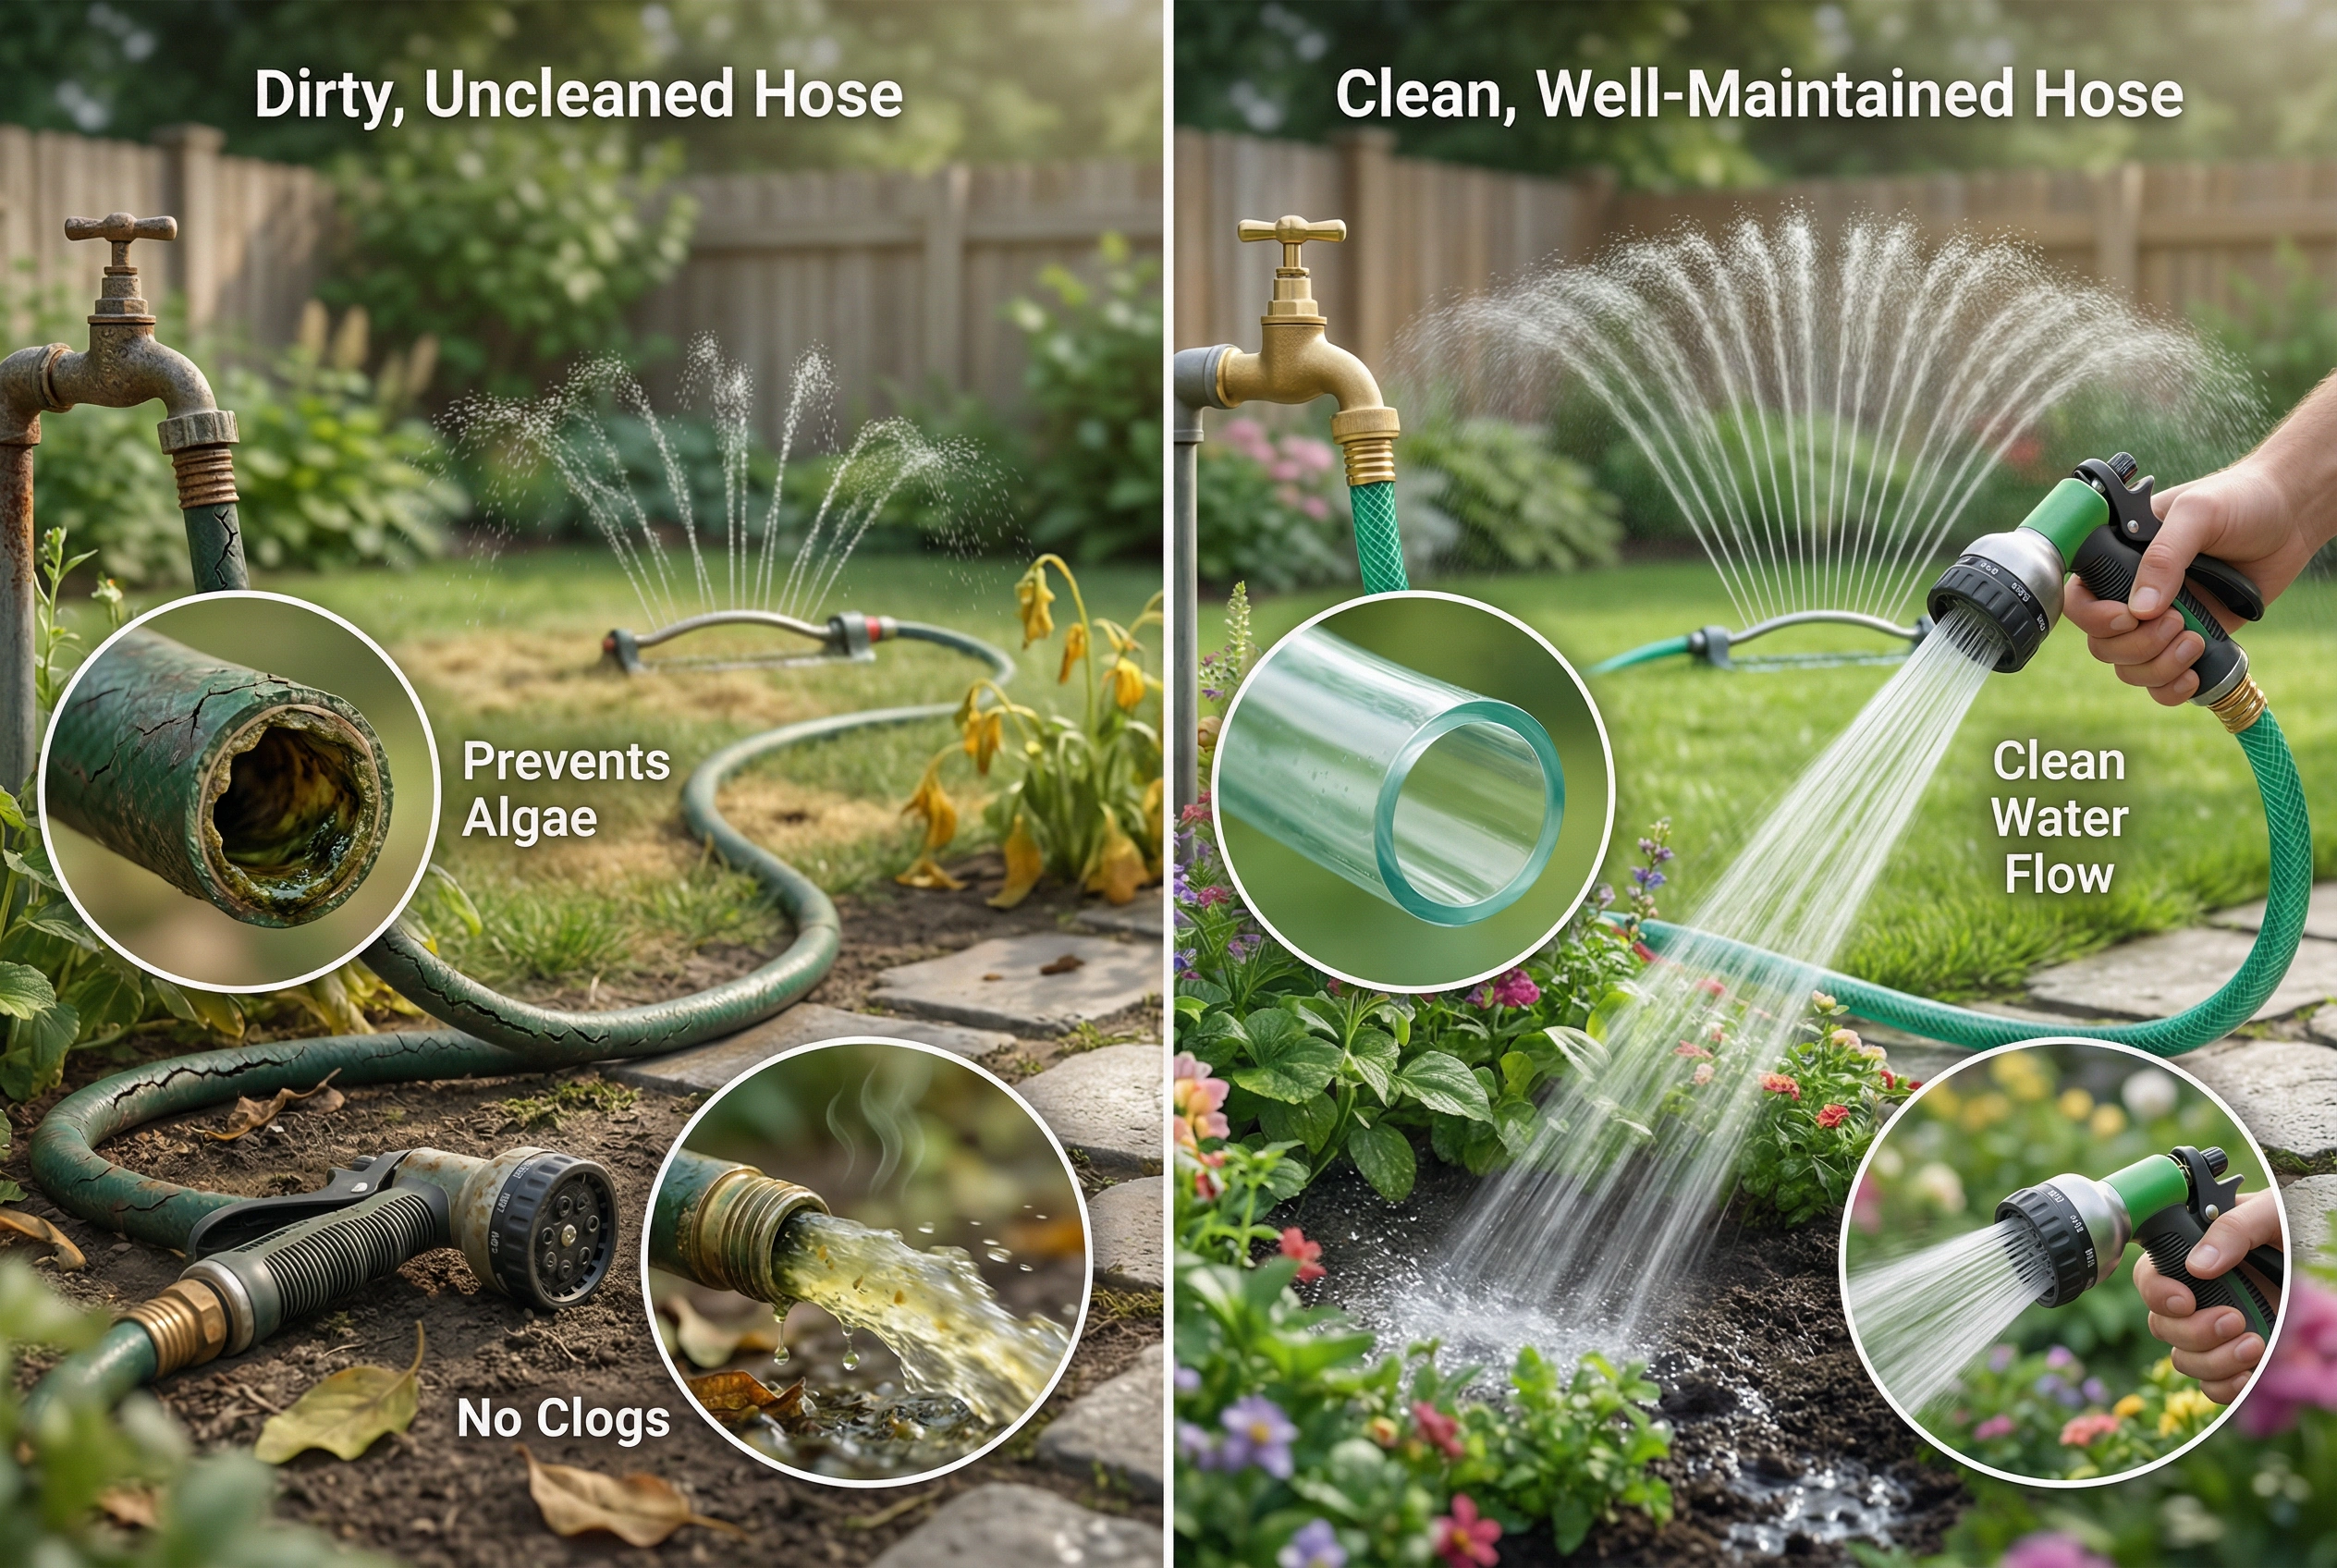
Regular garden pipe cleaning is essential for both performance and hygiene. Over time, dirt, algae, and mineral deposits accumulate inside the hose pipe, especially when water remains stagnant.
Benefits of Cleaning Your Garden Pipe
-
Prevents algae and bacterial growth
-
Maintains strong and consistent water flow
-
Reduces clogging in sprinklers and nozzles
-
Prevents unpleasant odors
-
Extends the overall life of your garden hose pipe
A clean pipe ensures healthier plants and safer water usage for washing patios or vehicles.
When Should You Clean Your Garden Pipe?
Knowing how to clean garden pipe is important, but timing matters too.
Signs Your Garden Pipe Needs Cleaning
-
Reduced water pressure
-
Green or black deposits inside the hose
-
Foul smell from the water
-
Visible dirt at pipe openings
Recommended Cleaning Frequency
-
Once a month during regular use
-
After using fertilizers or pesticides
-
Before storing the garden hosepipes for long periods
Step-by-Step: How to Clean Your Garden Pipe
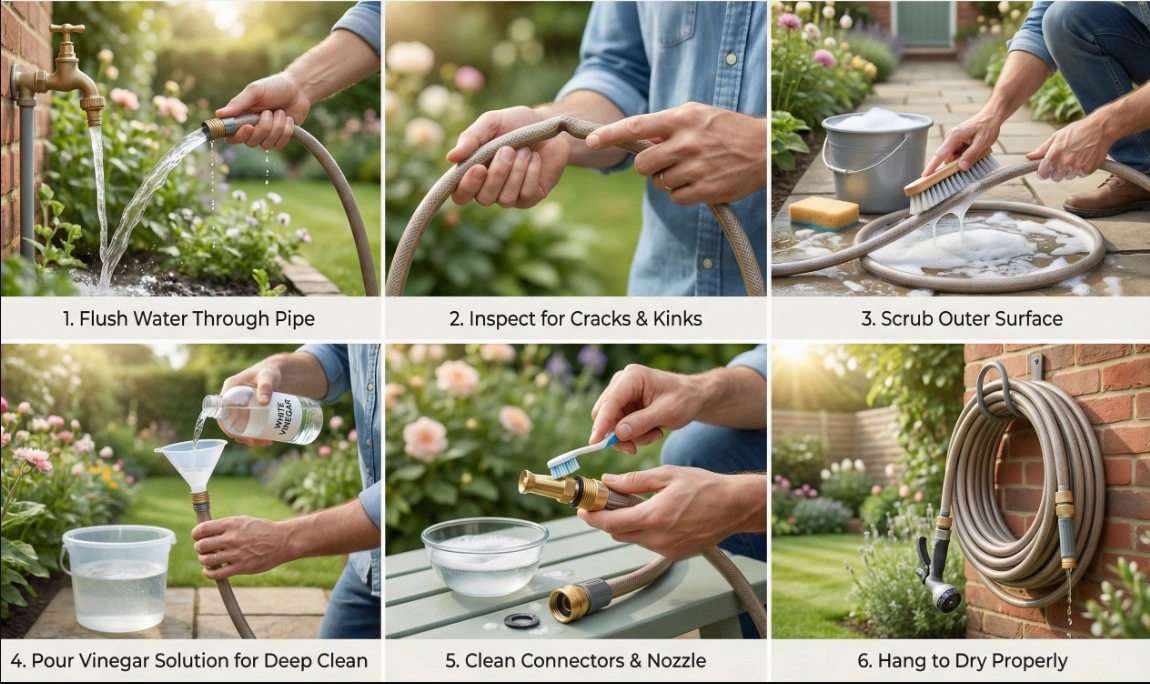
1) Flush and Inspect First
Before deep cleaning, disconnect both ends from the tap and nozzle. Run clean water through the pipe for 30–60 seconds to push out loose dirt.
While flushing, inspect the full length. Look for soft spots, cracks, or flattened sections where kinks usually form. Also check connectors for rust, grit, or worn rubber washers.
This quick check prevents you from cleaning a pipe that’s already damaged beyond repair.
2) Clean the Outside (Fast but Important)
Fill a bucket with water and add a few drops of mild dish soap. Dip a soft brush or sponge and scrub the outer surface.
Focus on areas that touch the ground most near the nozzle end and the first few feet near the tap end. Mud, fertilizer residue, and algae can stick there.
Rinse the outside with clean water and wipe with a cloth. A clean surface also reduces the chance of cracks from trapped grime and grit.
3) Deep Clean the Inside (Odor, Algae, Scaling)
If your pipe smells bad or the water looks slightly discolored at first flow, you likely need internal cleaning. This is the most effective part of garden pipe cleaning.
Vinegar soak method (safe and simple):
-
Mix 1 part white vinegar with 3 parts water in a bucket.
-
Use a funnel or slowly pour the solution into the pipe from one end.
-
Raise the filled pipe slightly and keep both ends higher so liquid stays inside.
-
Let it sit for 30–60 minutes.
After soaking, flush thoroughly with clean water for 2–3 minutes. This helps remove residue and smell.
If you have heavy mineral deposits (common in hard-water areas), repeat once more. Always rinse fully before using it again on plants.
4) Clean Connectors, Nozzles, and Threads
Many leaks come from the ends, not the pipe body. Remove the nozzle and check the rubber washer inside the connector.
Use an old toothbrush to scrub:
-
Threads (tap connector and nozzle connector)
-
Washer seating area
-
Any sand or grit stuck in grooves
If the washer looks flattened, cracked, or loose, replace it. A small washer replacement can stop a “mystery leak” instantly.
If water still drips from the threaded connection, wrap a little Teflon tape around the thread and reconnect firmly (don’t overtighten).
5) Dry Properly (Don’t Skip This)
Drying is the difference between “clean” and “clean for long-term.” Water left inside creates odor, algae, and internal wear.
Drain the pipe completely by holding one end up and walking the other end down. Then hang it over a hook or railing so remaining water runs out.
Let it air-dry for a short time before coiling. This one step dramatically improves pipe life.
Best Practices: How to Store Your Garden Pipe
Good storage prevents kinks, protects from sunlight, and keeps connectors from getting damaged. If you’re looking for the best way to store garden hose, these habits matter more than any fancy accessory.
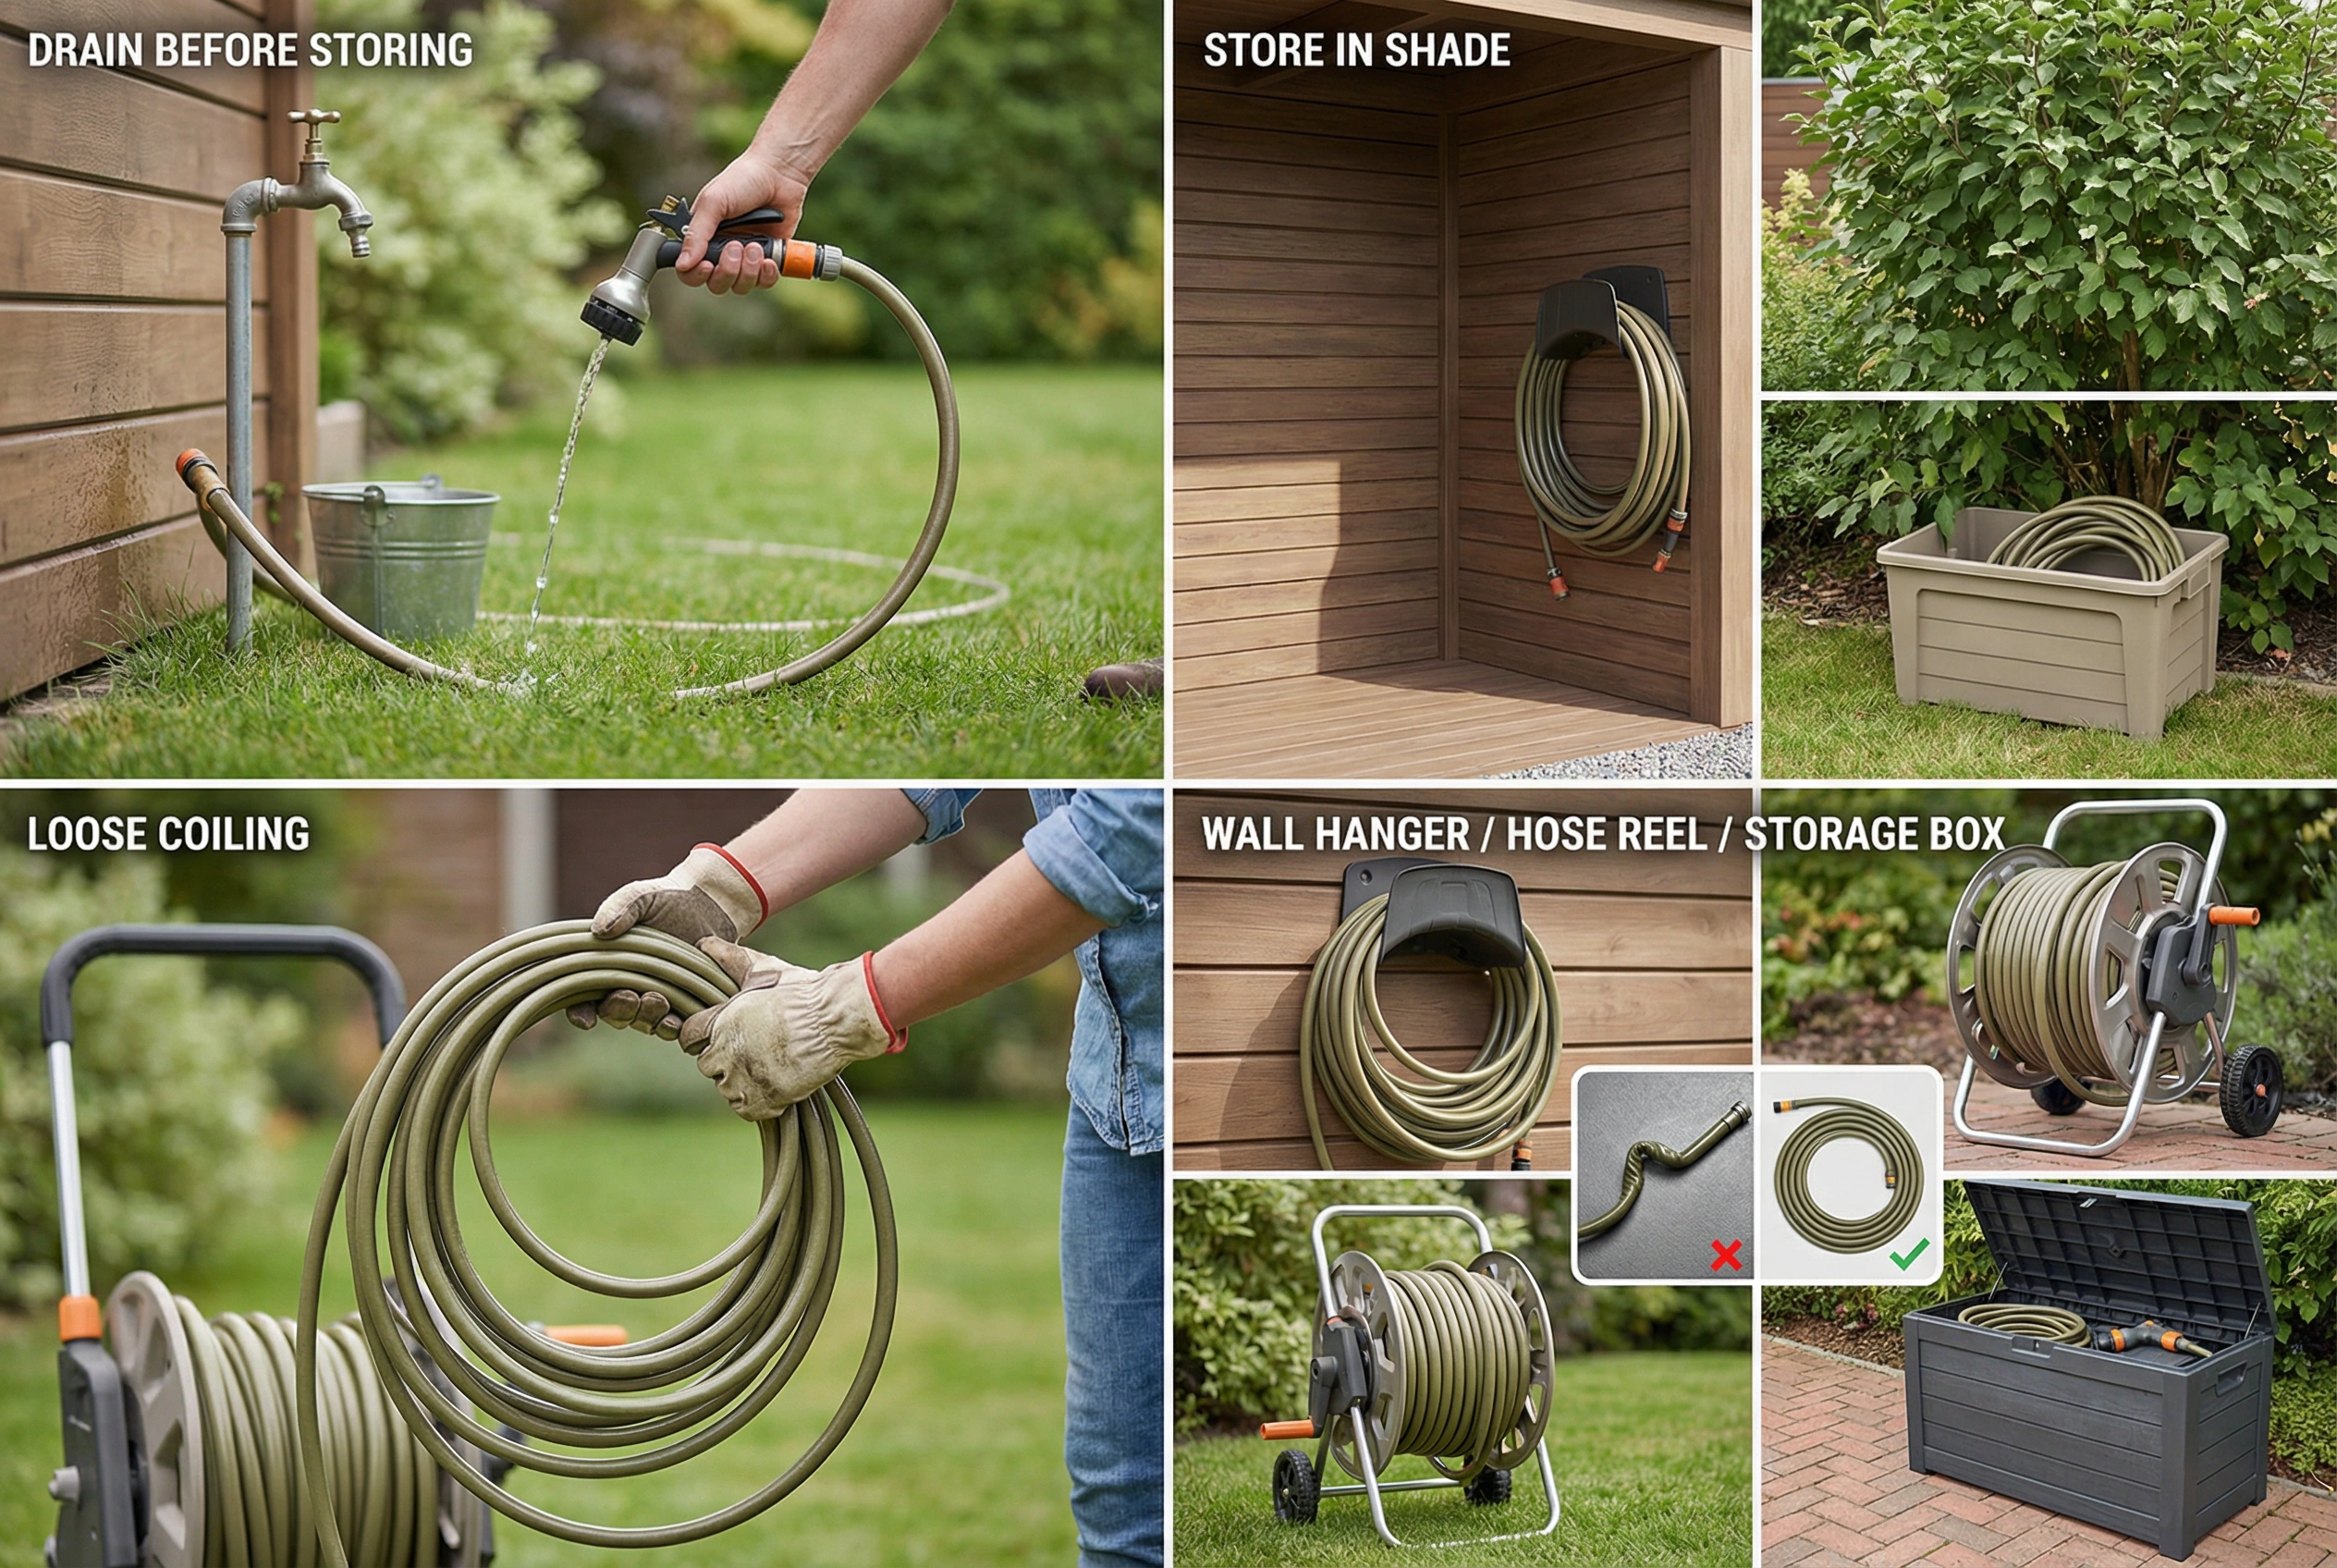
1) Drain It Every Time
Before storing, turn off the tap and release pressure. Disconnect, then drain the pipe fully.
Even a small amount of trapped water can lead to smell, algae, and stiffness over time. Draining also reduces weight, making it easier to coil neatly.
2) Keep It Away from Direct Sunlight
Constant sun exposure can weaken and harden many pipe materials. If your pipe sits outdoors in bright sun daily, its flexibility may reduce faster.
Store it in a shaded area, a storage box, or indoors when possible. If indoor storage isn’t possible, choose a covered location near the tap.
This is one of the simplest “do it once, benefit for months” habits.
3) Coil the Right Way
Tight loops create memory kinks that become permanent. Always coil into large, relaxed circles.
A good rule: if the coil feels “forced,” it’s too tight. Give it a wider loop and let the pipe rest naturally.
Avoid folding it sharply or hanging it on a narrow nail. Use a proper hook, wide hanger, or reel.
4) Choose a Storage Method That Fits Your Space
Here are practical garden hose storage ideas that work for most homes:
-
Wall-mounted hanger: Great airflow and easy access. Choose a wide hook that supports large coils.
-
Hose reel: Helps prevent kinks and keeps the setup neat, especially for long pipes.
-
Storage box: Protects from sunlight and keeps the area tidy just make sure the pipe is dry first.
-
Portable hose cart: Ideal for larger gardens and long pipes.
These are also easy hose storage ideas if you want quick organization without spending too much.
5) Seasonal Storage (When You Won’t Use It for Weeks)
If you won’t use it for a while:
-
Wash and dry it fully
-
Remove nozzle and connectors
-
Coil loosely
-
Store in a cool, shaded place
Even in mild climates, long idle storage without draining can create smell and reduce flexibility. This is especially important for garden hosepipes used for clean watering.
Small Habits That Prevent Damage
A few daily habits make a big difference:
-
Don’t drag the pipe across sharp edges or rough corners
-
Avoid leaving it under high pressure when not in use
-
Don’t park vehicles or heavy items on it
-
Fix leaks early small drips often become bigger cracks
-
Keep the tap connection clean to prevent thread damage
If your garden hose pipe has repeated leaks at multiple points, feels brittle, or stays kinked even after careful coiling, replacement may be more cost-effective than constant repairs.
Common Mistakes to Avoid
Avoid these mistakes to protect your garden hose pipe:
-
Storing the pipe while wet
-
Leaving it exposed to sunlight
-
Dragging it across rough surfaces
-
Using chemical cleaners
-
Overstretching or twisting the hose pipe
These errors shorten the lifespan of even high-quality garden hosepipes.
Scotto Pipes: A Simple Note for Longer Service Life
A long-lasting setup is a mix of quality material and correct habits. With Scotto Pipes, choosing the right pipe for your pressure needs is step one. Step two is consistent care regular rinsing, occasional deep cleaning, and correct storage.
If you want fewer leaks and better flexibility over time, treat your garden pipe like any other tool: keep it clean, keep it dry, and store it smartly.
Conclusion
A garden pipe may seem like a simple tool, but proper care makes a big difference. By following correct garden pipe cleaning methods and choosing the best way to store garden hose, you can prevent damage, maintain performance, and extend its lifespan significantly.
Simple habits like drying the hose pipe, using smart garden hose storage ideas, and regular inspections ensure that your garden hosepipes remain efficient and reliable season after season. Start caring for your garden pipe today and enjoy hassle-free gardening for years to come.
FAQ
1. How often should I do garden pipe cleaning?
Light cleaning once every 2–4 weeks is enough for regular use. If you notice odor, reduced flow, or slimy buildup, do a deep clean sooner.
2. How to clean a garden pipe if it smells bad?
For odor, the vinegar soak method works well. Fill the pipe with a diluted vinegar solution, soak for 30–60 minutes, then flush thoroughly with clean water.
3. Can I use bleach to clean a hose pipe?
It’s better to avoid bleach unless the manufacturer confirms it’s safe for your pipe type. Bleach can be harsh and may affect materials over time. Mild soap and vinegar are usually safer options.
4. What is the best way to store garden hose to prevent kinks?
The best way to store garden hose is to drain it fully and coil it in large, loose loops. A wide wall hook or hose reel helps prevent tight bends.